Recruiting and your careers page
Publish jobs on your company careers page, track applicants by stage, schedule interviews, then turn the chosen applicant into an employee without retyping their data.
From job posting to new employee in one place. Publish jobs on your company careers page, track applicants through each selection stage, schedule interviews, then turn the hired applicant into an employee without retyping their name, email and form answers.
Before you start
- Open the Rekrutmen (Recruitment) menu, available to Admins and HR Managers.
- Set up your Halaman Karier (careers page) first so your jobs have a proper place to appear.
Set up your careers page
- In Rekrutmen, click Halaman Karier.
- On the Perusahaan (company) tab, fill in Nama Perusahaan (tampil ke publik) (public company name), Slug URL Publik (public URL slug), Tagline / Pitch and Profil Perusahaan (company profile), and upload a logo and banner (PNG/JPG/WebP, up to 1 MB).
- Adjust the style on the Tampilan (appearance) tab and group jobs on the Kategori (categories) tab. The desktop and mobile previews update instantly.
- Tick Terbitkan halaman karier (publish careers page) and click Simpan (save).
Your page is live at careers.logixbase.com/your-slug. The Lihat Publik (view public page) button opens it in a new tab.
Create a job posting
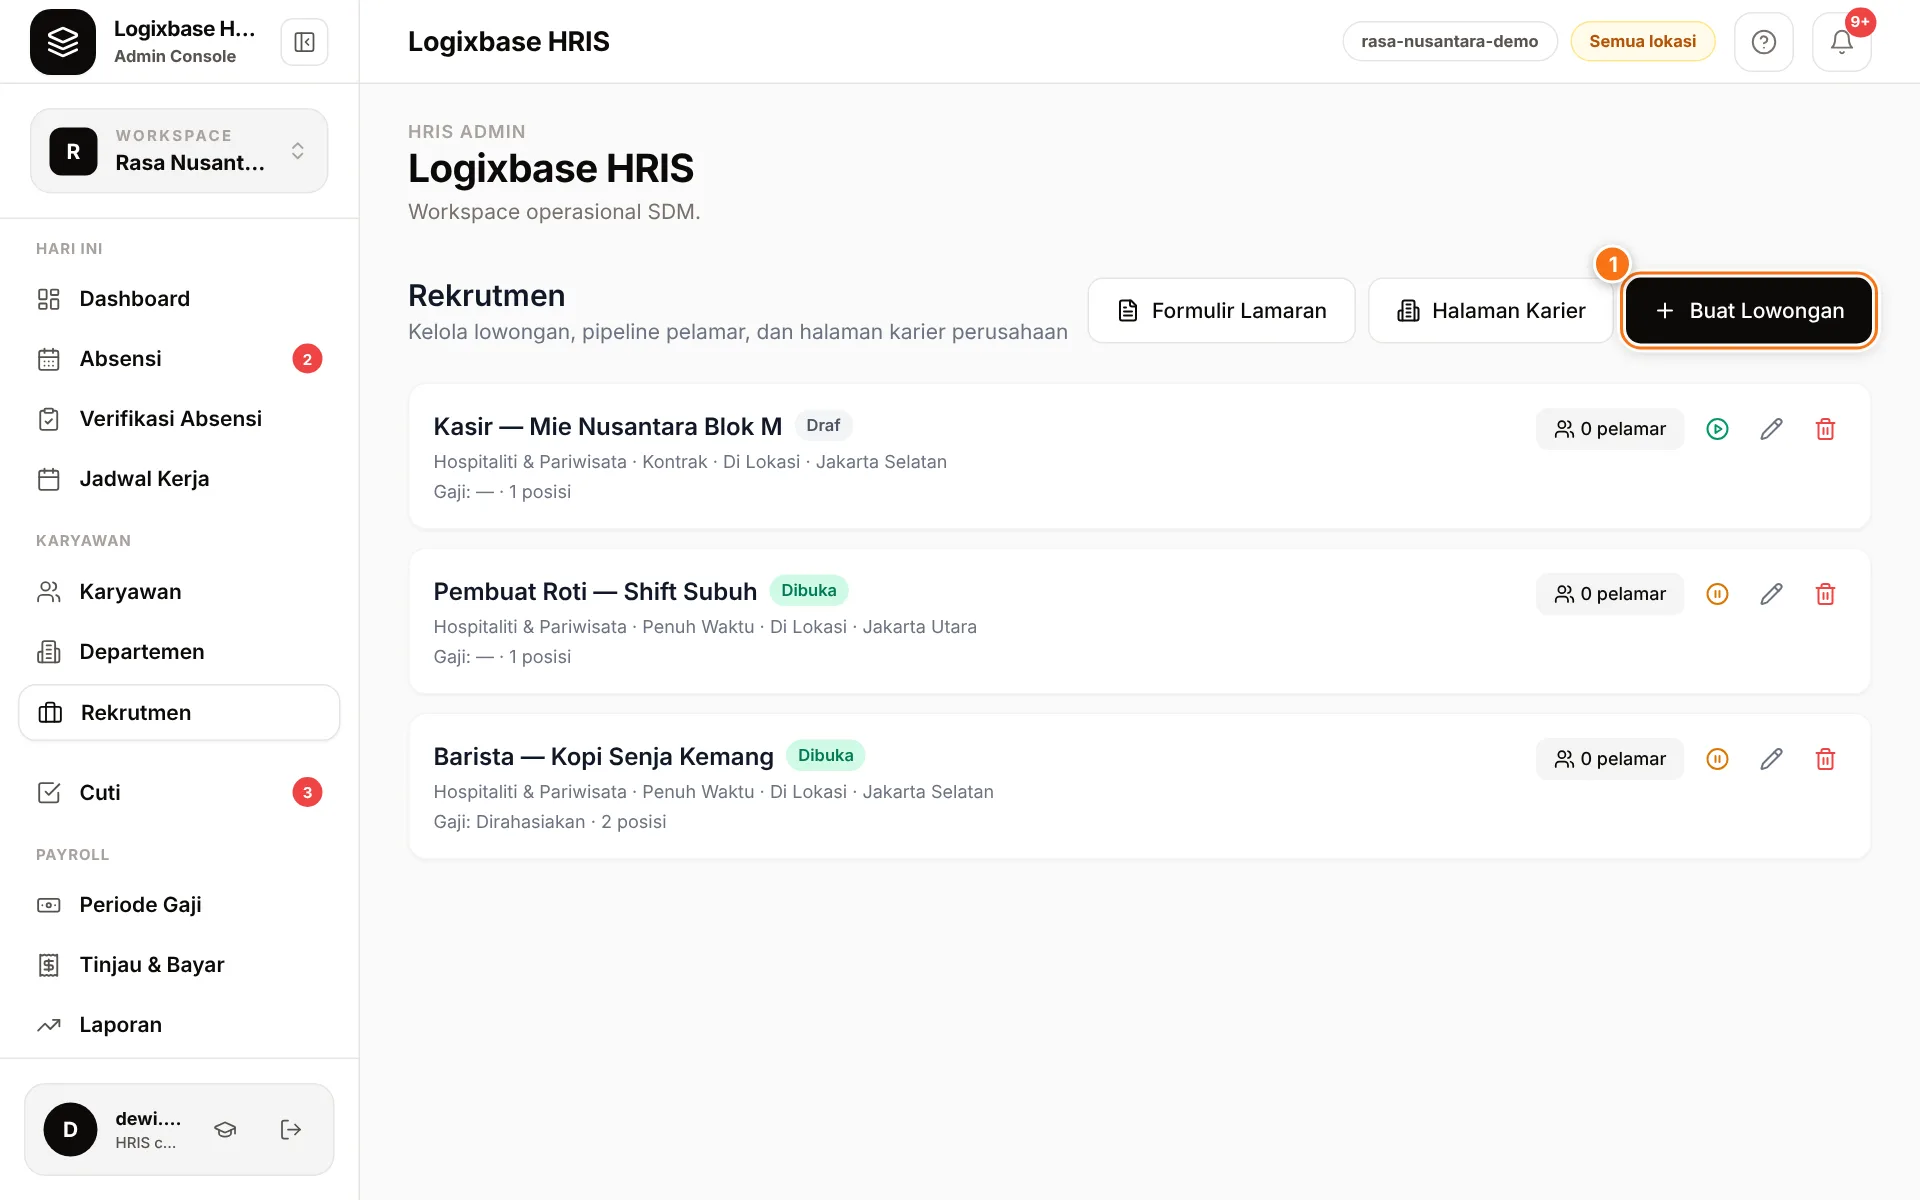
- Click Buat Lowongan (create job) (1).
- Informasi Dasar (basic information): fill in Judul Posisi (job title), Deskripsi, Tipe Pekerjaan (job type), Mode Kerja (work mode), Divisi / Kategori, Klasifikasi Pekerjaan (job classification), Lokasi, Jumlah Posisi (openings), the salary range, and Kualifikasi (qualifications), Tanggung Jawab (responsibilities) and Benefit. Untick Tampilkan rentang gaji di halaman publik (show salary range publicly) to keep pay confidential.
- Formulir Lamaran (application form): reuse an existing form, create a new one, or choose no form.
- Tahapan Seleksi (selection stages): set the stages between Melamar (applied) and Diterima (hired). The defaults are Seleksi (screening), Wawancara (interview) and Penawaran (offer); you can rename, reorder, remove or add stages.
- Tinjau (review): click Terbitkan (publish) to show the job on your careers page and the public job board, or Simpan Draf (save draft) to keep it without publishing.
A Klasifikasi Pekerjaan is required before a job is published for the first time, because candidates use it to filter jobs.
In the job list, each card shows its status (Draf draft, Dibuka open, Dijeda paused, Ditutup closed, Terisi filled) and a Publikasikan (publish) or Jeda (pause) icon to put the job live or pause it. Edit and Hapus (delete) are there too.
Forms you use often can be built once under Formulir Lamaran › Buat Formulir (create form) and picked for many jobs.
Manage applicants
Applicants open your job, tap Masuk & Lamar (sign in and apply), and fill in the form. Their application goes straight into the pipeline.
- Click the N pelamar (N applicants) button on a job card to open the Pipeline Pelamar (applicant pipeline) — one column per stage.
- Click an applicant to open Detail Pelamar (applicant details): Lihat CV (view CV), Jawaban Formulir (form answers), Pindahkan ke tahap (move to stage), Rating (1–5 stars) and the application history.
- Jadwalkan Wawancara (schedule interview): set the Waktu (time), Mode (Di Lokasi on-site, Video or Telepon phone) and Lokasi / Tautan (location or link), then click Jadwalkan. The candidate sees the interview on their application page. The app does not send emails, so also let the candidate know through your usual channel.
- Tolak (reject): enter a rejection reason for your records.
Hire an applicant as an employee
- In Detail Pelamar, click Terima & Onboard ke HRIS (accept and onboard to HRIS).
- Check the Nama Lengkap (full name) and Email taken from the application. Fill in NIK (16 digit), Gaji Pokok (base salary), Tipe Gaji (salary type), Tipe Kepegawaian (employment type), Tanggal Bergabung (join date) and Brand / Perusahaan.
- Tick the personal-data processing consent (Indonesia's PDP law), then click Terima & Buat Karyawan (accept and create employee).
The new employee appears in the Karyawan (Employees) menu right away, with the job title taken from the posting. Other data from the application form, such as address or date of birth when asked, is carried over. Next: complete their payroll data and invite them to the app.
Common problems
- The Publikasikan icon opens the editor with a message that the job has no classification: choose a Klasifikasi Pekerjaan in the Informasi Dasar step, then publish.
- The careers page isn't publicly reachable: make sure Terbitkan halaman karier is ticked and that you clicked Simpan.
- "Email sudah terdaftar di organisasi ini" (email already registered) when hiring: an employee with that email or NIK already exists. See Adding and managing employees.